# Window tab

# Choose how to generate the windows section
In this section, using the drop-down menu, you can choose how to generate the windows.
There are 2 options:
- Glass Lines
- Window-to-Wall Ratio values.
Depending on the option selected, the interface will change, offering different possibilities for editing or adding windows.
The Glass Lines and WWR Values options do not interact with each other, so if windows have already been generated in the model using one of the two ways, the other will just add more windows to the model, with the risk of having two or more surfaces overlapping one another.
This is not a problem if the user wants to treat the floors in different ways, as Glass Lines can be used for a number of floors and the WWR Option for others, more on this later.
Tip:
The Glass Lines and WWR Values options are independent, so windows generated by Glass Lines cannot be modified by option WWR Values.
We recommend to deactivate the 3D Zones Preview previously activated in the Geometry Fix tab, so that only geometries already baked within Rhino are displayed (more on this in the chapter on the Geometry Fix tab).
# Glass Lines
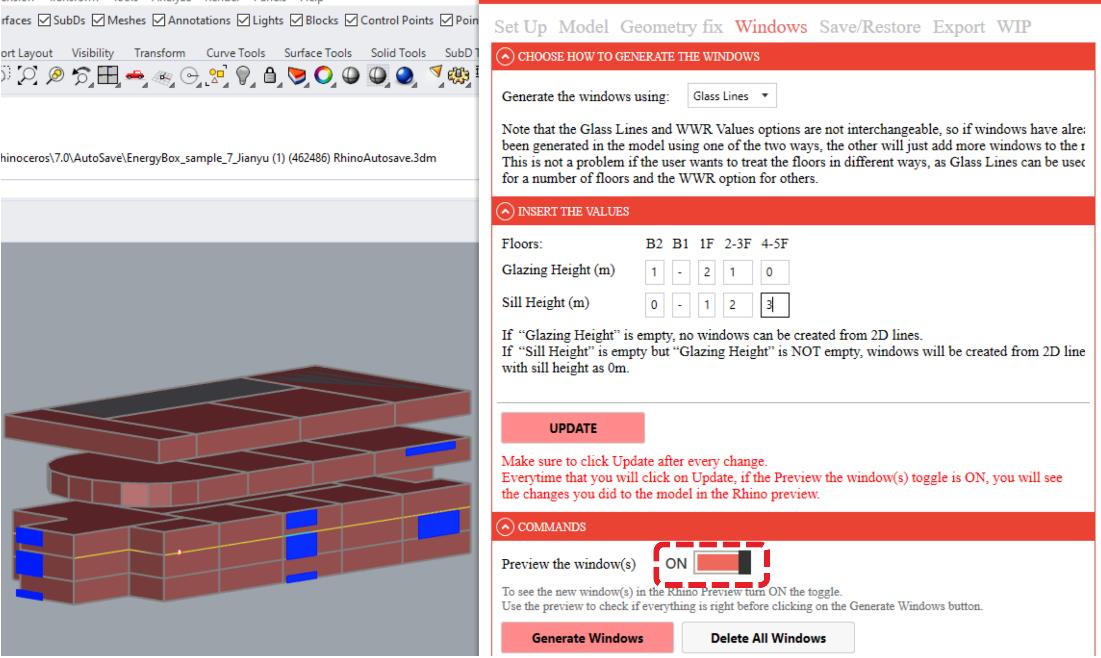
If you choose to use this option, the algorithm will refer to the open curves that you have drawn in the Glass Lines layers during the drawing phase, in the Model tab, and will offer you the possibility of interacting with them by deciding the Sill Height and the Glazing Height, using metres as the unit of measurement.
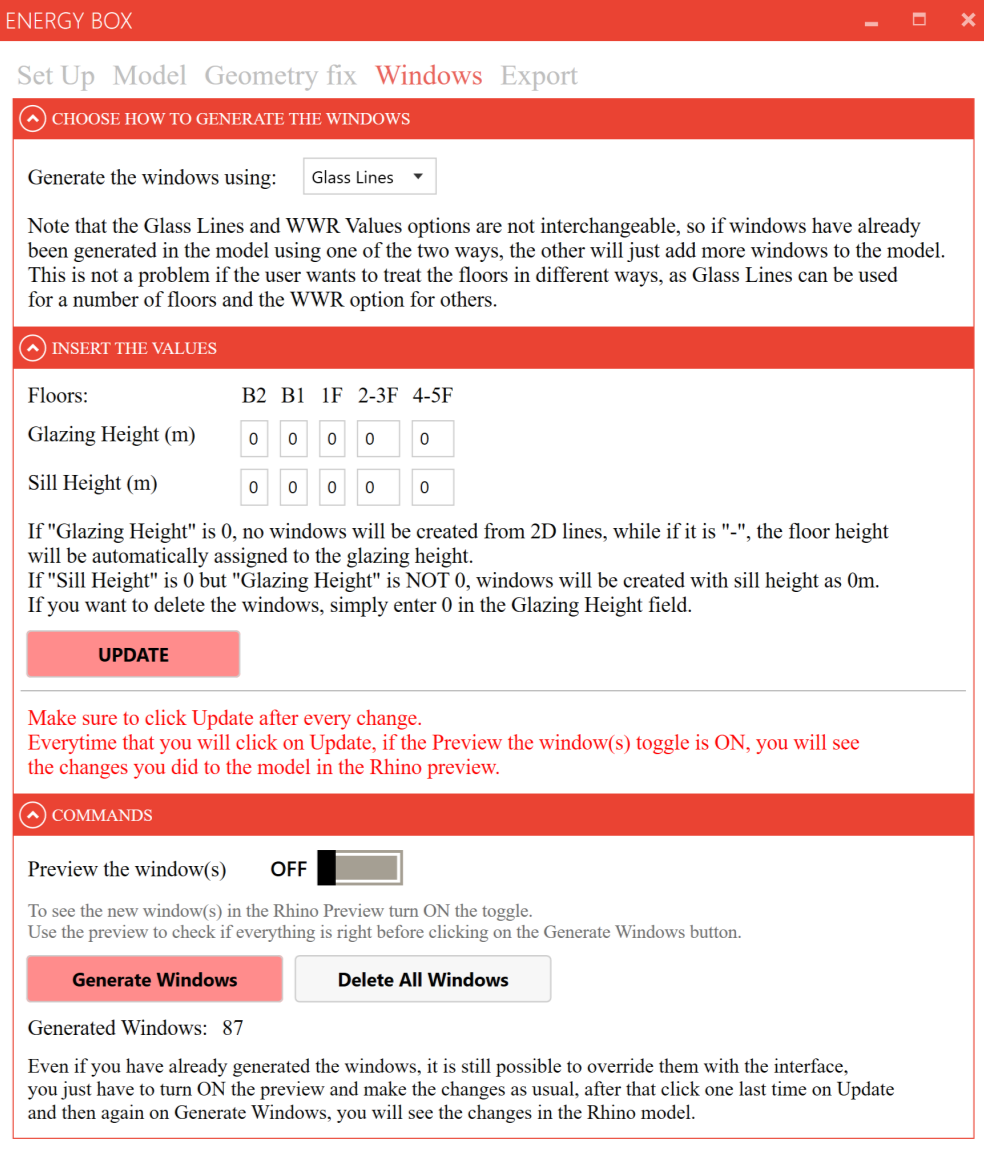
# Insert the values section
The floors within the interface are those that have at least one curve in Rhino's Glass Lines layer.
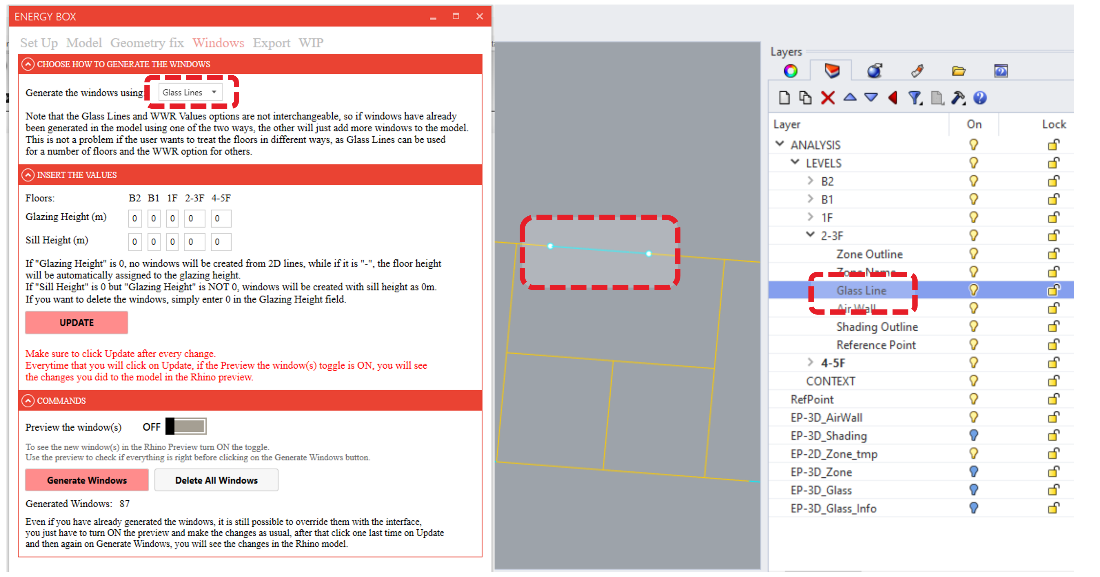
Tip:
If Floors row is empty, this means that no glass line has been drawn. If that's not the case, please check whether the previous step succeeded.
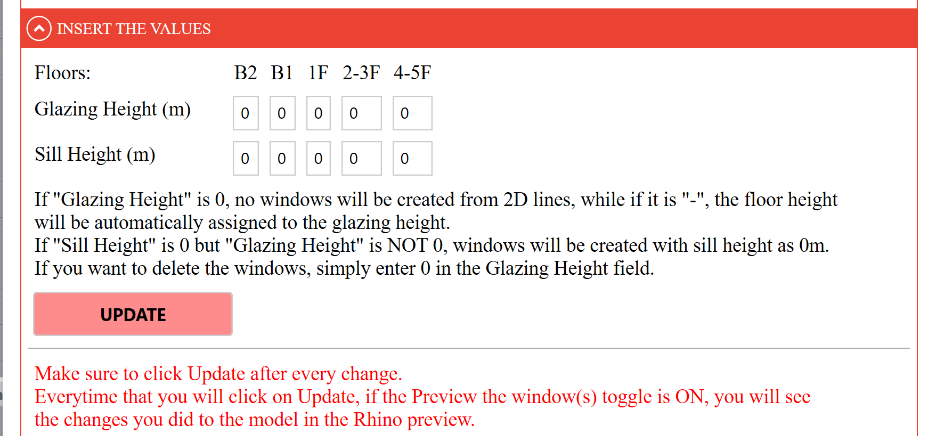
- If Glazing Height = 0 , no windows will be created from 2D lines.
- If Glazing Height = "-", the floor height will be automatically assigned to the Glazing height.
- If Sill Height = 0 but Glazing Height is NOT 0, windows will be created with sill height as 0m.
- If you want to delete the windows, simply enter 0 in the Glazing Height field.
Please make sure that the sum of Glazing Height and Sill Height is always smaller than the floor height.
By clicking on Update, height information is assigned to windows. Each time you click on it, and if the Preview the window(s) toggle is ON, you will observe the modifications made to the model in the Rhino preview.
Utilize the Preview the window(s) toggle in the Commands section to verify the correctness of the window geometry. Once confirmed, click the Generate Windows button to bake the windows in Rhino.
Tip:
Make sure to click Update after every change.
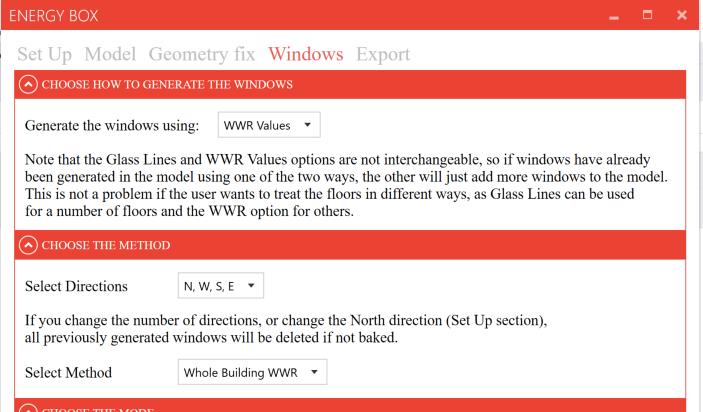
# WWR Values - Window to Wall Ratio
By choosing to use this option, the algorithm will give you the possibility, through various methods that will be explained later, to choose on which external surfaces to apply the windows and with what percentage.
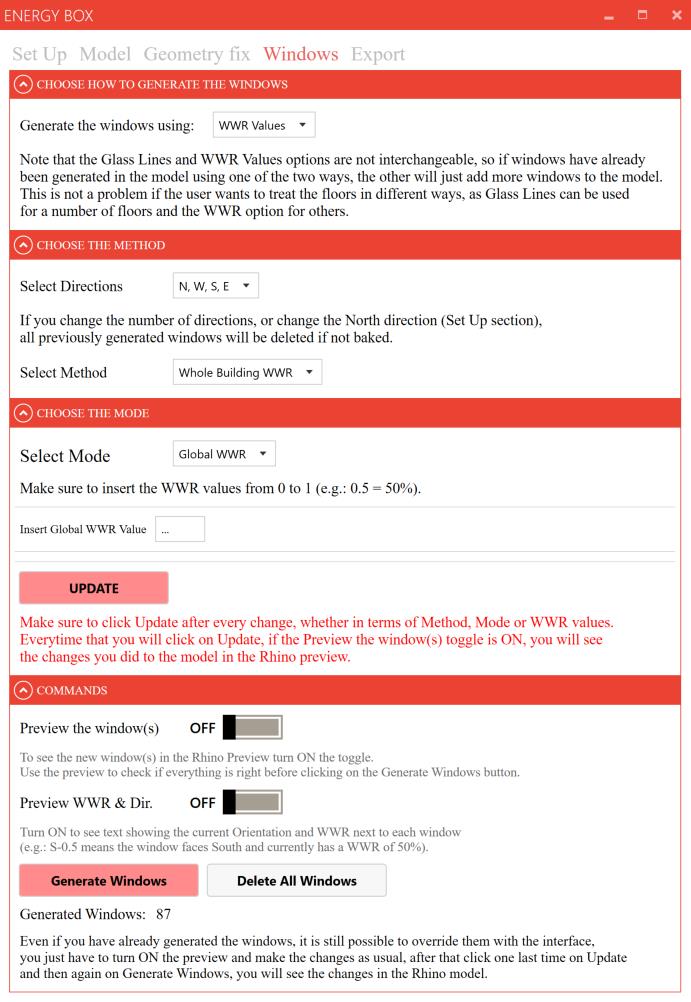
# Choose the Method section
The Select Directions drop-down menu allows to choose between 4 or 8 facade orientations. This option will allow the filtering of the facades and will facilitate the use of this option for the creation of new windows.
Please decide the number of directions at the very beginning. Changing the number of directions or the North direction (Set Up tab) while using the WWR Values option will delete all the windows that are not baked yet.
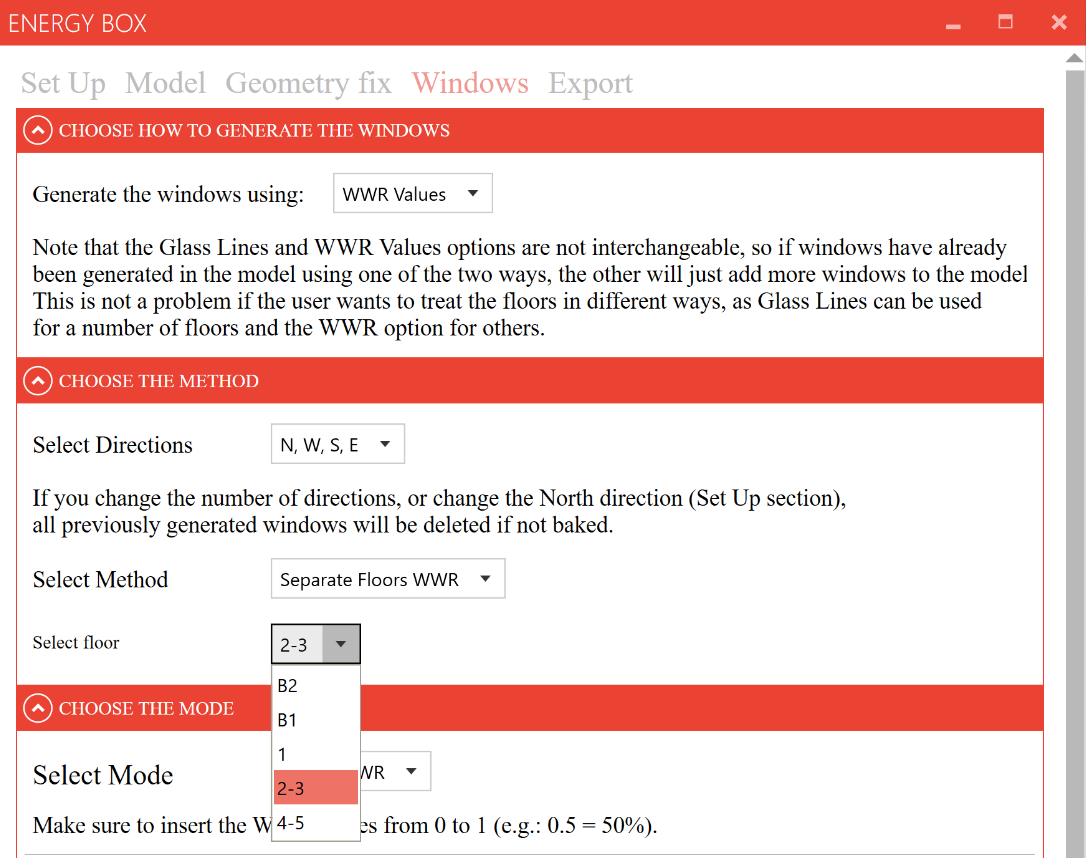
Using the drop-down menu Select Method you can choose between:
- Whole building WWR
- Separated Floor WWR
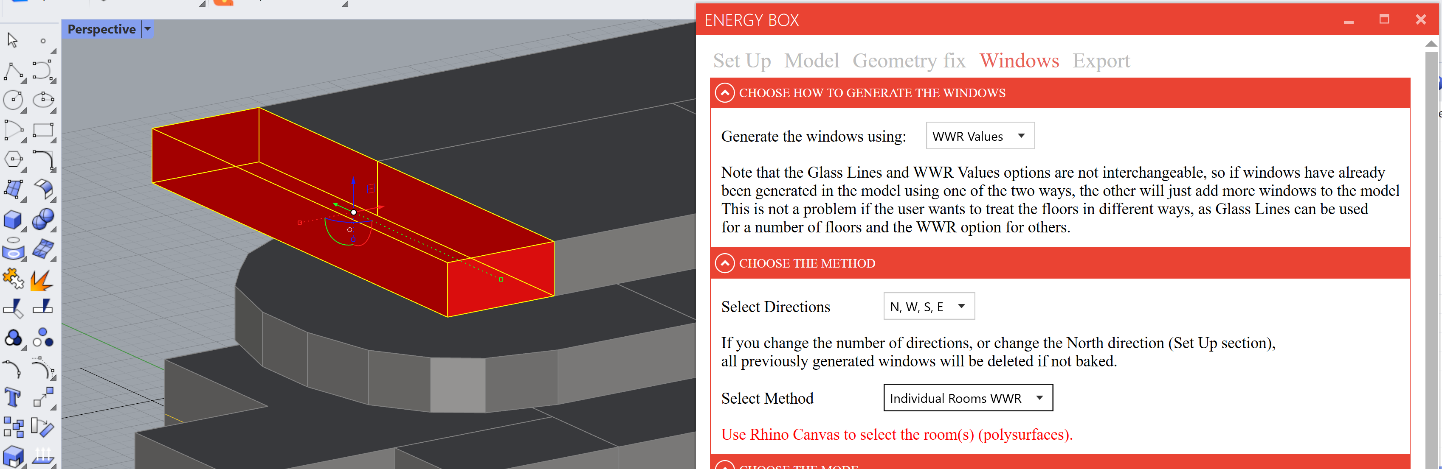
- Individual Rooms WWR
These Methods allow you to filter geometries and decide on which surfaces the windows will be applied, depending on which Mode you will select in the Choose the Mode section.
Whole building WWR:
Allows you to consider the whole building you have modelled, and to generate windows on all external surfaces.
Separated Floor WWR:
Allows you to consider each level of the building separately. Once selected, a drop-down menu containing a list of all floors within the building will appear, use it to select the desired floor.
Individual Rooms WWR:
Gives you the possibility to manually select one or more previously baked zones with the mouse cursor. In case you want to select more than one zone, simply hold down Shift on your keyboard while selecting the different zones. Once selected, the zones will turn red.
# Choose the Mode section
This section provides access to the different options for creating and overriding window creation, allowing you to assign WWR to all windows, to windows with the same orientation or to a single window.
The Mode you choose to use for window creation will only be applied to the geometry you have previously selected in the Choose the Method section.
Using the Select Mode drop-down menu, you can choose between:
- Global WWR
- Separated WWR
- Single Surface WWR.
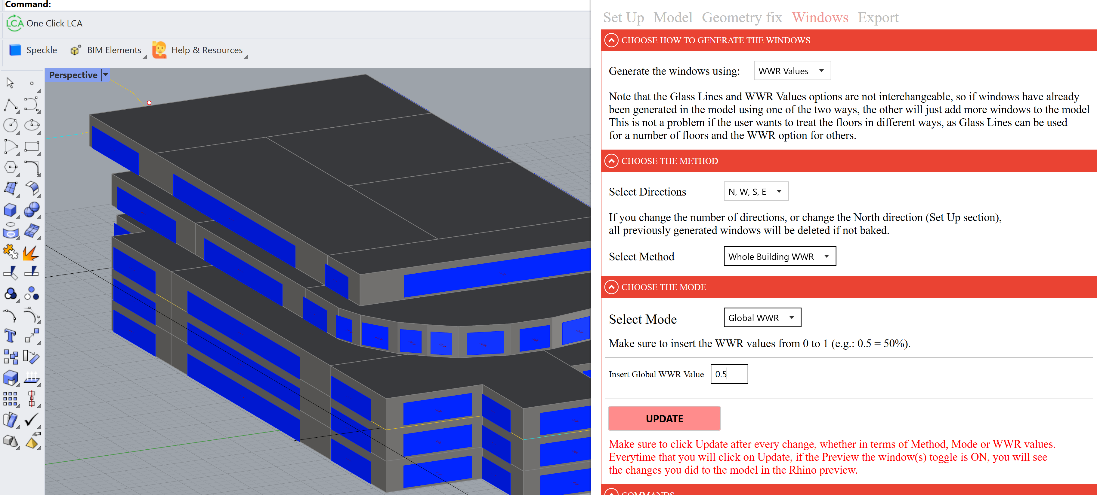
Global WWR:
Assigns a single value to all external surfaces of the geometry previously selected using the Method.
In the following, a value of 50% was applied to the entire building using the Whole building WWR Method.
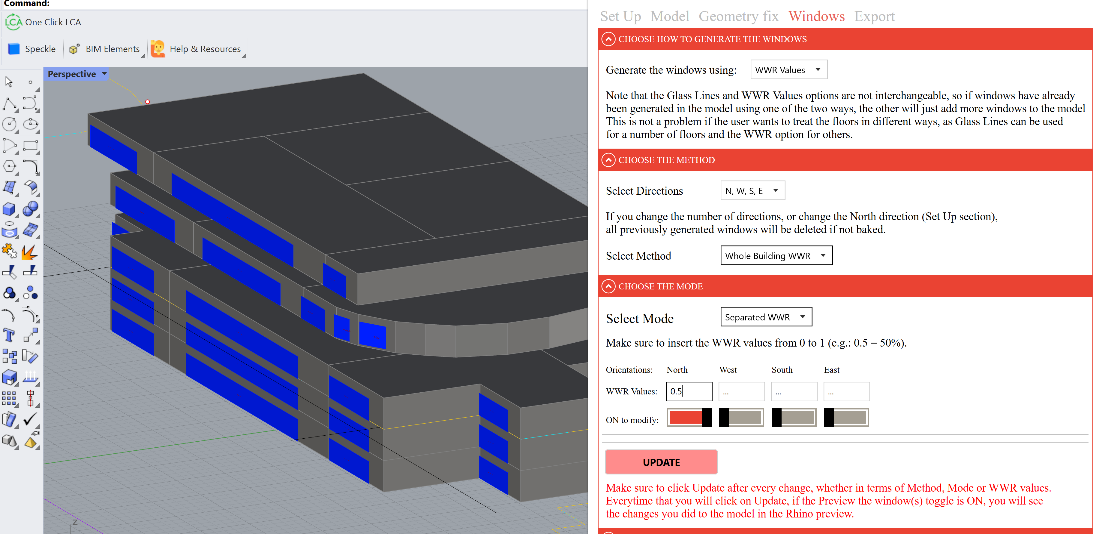
Separated WWR:
Gives the option of applying the WWR value only to faces oriented in the same direction. The number of directions that will appear in the interface will depend on the number of directions initially selected in the Choose the Method section. To apply the WWR make sure to set the toggle(s) under each direction to ON, the values will only be applied if the corresponding toggle is active.
In the following example, a value of 50% was only applied to North-facing façades.
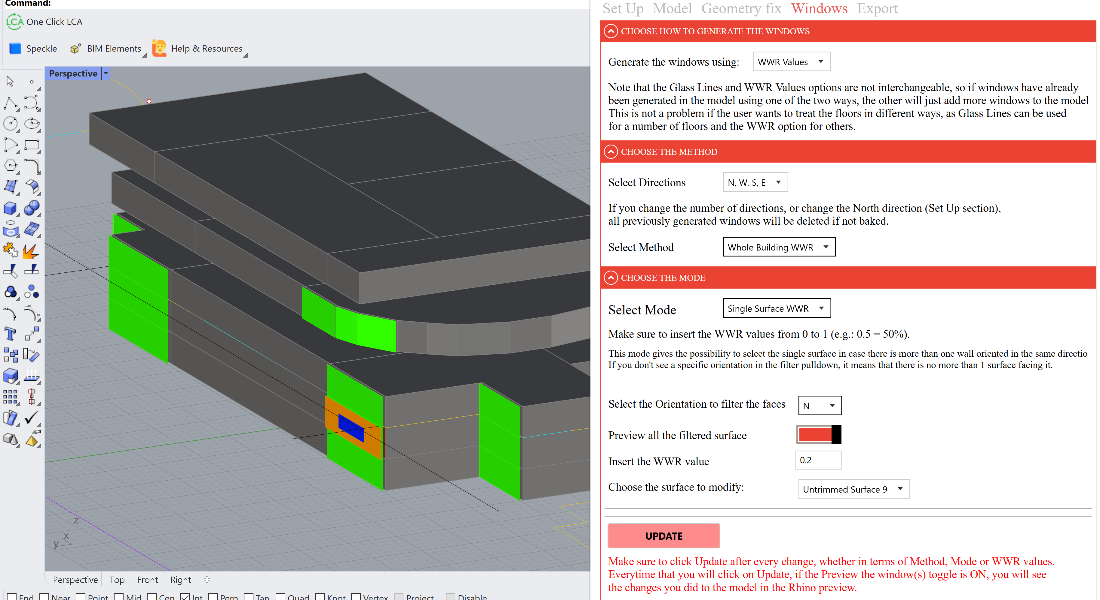
Single Surface WWR :
Gives you the option of filtering building surfaces according to their orientation. By selecting the desired orientation using the drop down menu and setting the Preview all the filtered surfaces to ON, if the geometry previously selected by the Method has more than one face in the chosen orientation, the various faces will be displayed in green.
Using the Choose the surface to modify drop-down menu, it is possible to choose the individual face to which the WWR value is to be applied, the face selected within this drop-down menu will be colored orange.
In the following case we first filtered all the faces towards the North of the Whole Building, chose the desired face, and applied a value of 20%.
Tip:
Remember to switch ON the toggle Preview the window(s), in the Commands section, to see the new window(s). They will become visible only after clicking Update.
# A Hybrid approach
As mentioned above, the Glass Lines option and the WWR Values option do not interact with each other, this can be used to your advantage when you want to model a building of which you already have an idea of how you want to arrange the windows.
Simply draw Glass Lines (in the Draw phase, Model tab) precisely on the floors where you want to pay particular attention to the position of the windows and leave the Glass Line layers of the remaining floors empty.
Once you get to the Windows tab, simply apply a WWR value to the Whole Building, proceeding by floors, individual zones or using a generic one for the whole model, and then use the Separated Floors WWR Method to delete the windows of the floors to which you want to pay particular attention, by just inserting 0.
Now you can simply switch option, choosing Glass Lines, and enter the desired Glazing and Sill Heights of the windows.
# Commands section
In this section, you can preview the generated windows and check if they are correct using the Preview the window(s) toggle.
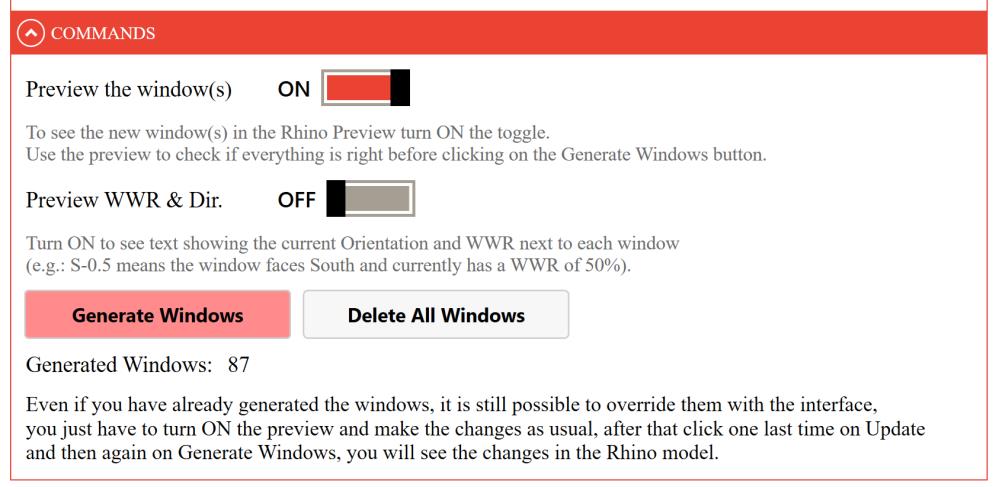
If the preview of geometries is correct, you can push the Generate Windows button to generate the geometries within Rhino. They will automatically be placed in the EP-3D_Glass layer.
Inspect the model to ensure everything is correct.
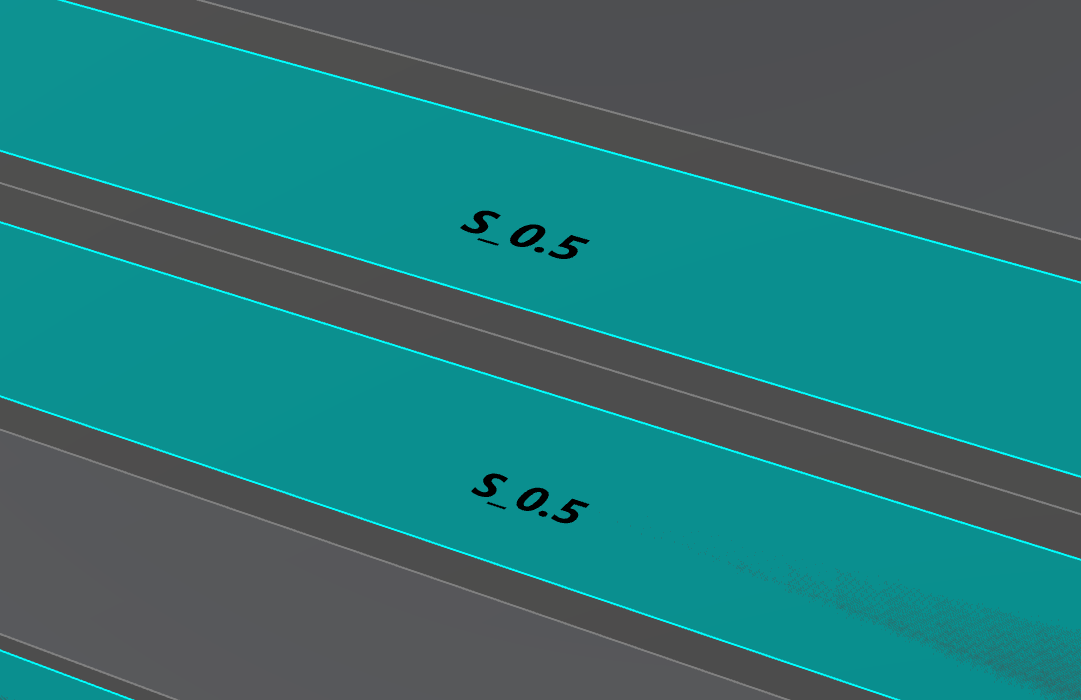
The Preview WWR & Dir. toggle gives the possibility to see the WWR value and the direction of each of the windows. This feature can be very helpful for complex geometries, to display it correctly use the Top View.
Once the Generate Windows button is pushed, this information will be baked into Rhino's EP-3D_Glass_Info layer.
E.g.: S-0.5 means the window faces South and currently has a WWR of 50%.
Even if you have already generated the windows, it is still possible to override them with the interface, you just have to turn ON the preview and make the changes as usual, after that click one last time on Update and then again on Generate Windows, you will see the changes in the Rhino model.